

A truffle tree is an eye-catching way for your customers to serve truffles to a large group, in addition to an impressive merchandising display for your retail shop. It is a big-ticket item that can add nice revenue to your store’s sales. With a little advance planning, building the tree can be relatively easy to execute.
Here you will find a list of materials needed and
step-by-step instructions from RCI member, Annedore's Fine Chocolates, for
creating this showpiece.
For ease of construction, undipped ganache balls may
be stored in the freezer. Simply follow the instructions below for thawing and
dipping the ganache balls and you are ready to build a tree on demand.
Materials Needed
- Truffles (see recipes below)
- Silicone mats
- Plastic wrap
- Foam block
- Parchment paper or aluminum foil (optional)
- Round toothpicks
- Tempered chocolate
- Foam cone
- Wrapping paper or fabric (preferably coordinating with the color of your truffles)
- Flathead pins
- Scissors
- Ribbon or tree topper (optional)
Step-By-Step Instructions
Prepare truffle centers using your favorite ganache
recipe. Pipe ganache onto silicone mats. Cover the mats with plastic wrap and
refrigerate for 12 hours. Transfer mats to the freezer for 12 hours. Remove
mats from the freezer and pop out ganache balls (Note: Ganache centers may
be returned to the freezer for future use). Cover balls with plastic wrap
and allow them to come to room temperature.

Cover a foam block with parchment paper or aluminum
foil, so it can be reused. Adhere a toothpick into each ganache ball by dipping
one end of the toothpick into tempered chocolate and then inserting that end
into the center of the flat side of the ganache ball. Allow toothpick to set up
firmly in the ganache ball.
Once the toothpick is firmly set in the ganache ball
you are ready to dip each ganache ball in tempered chocolate. Dip each ball
carefully and then insert tooth-picked end of the ball into the block of foam.
This will allow for perfect-looking, uniform truffles to create your truffle
tree. Allow chocolate to set up. Truffles may be decorated while standing in
the block of foam.
Before you begin to build your tree, first, wrap the
foam cone completely with wrapping paper or fabric – secure with flathead pins,
as needed.
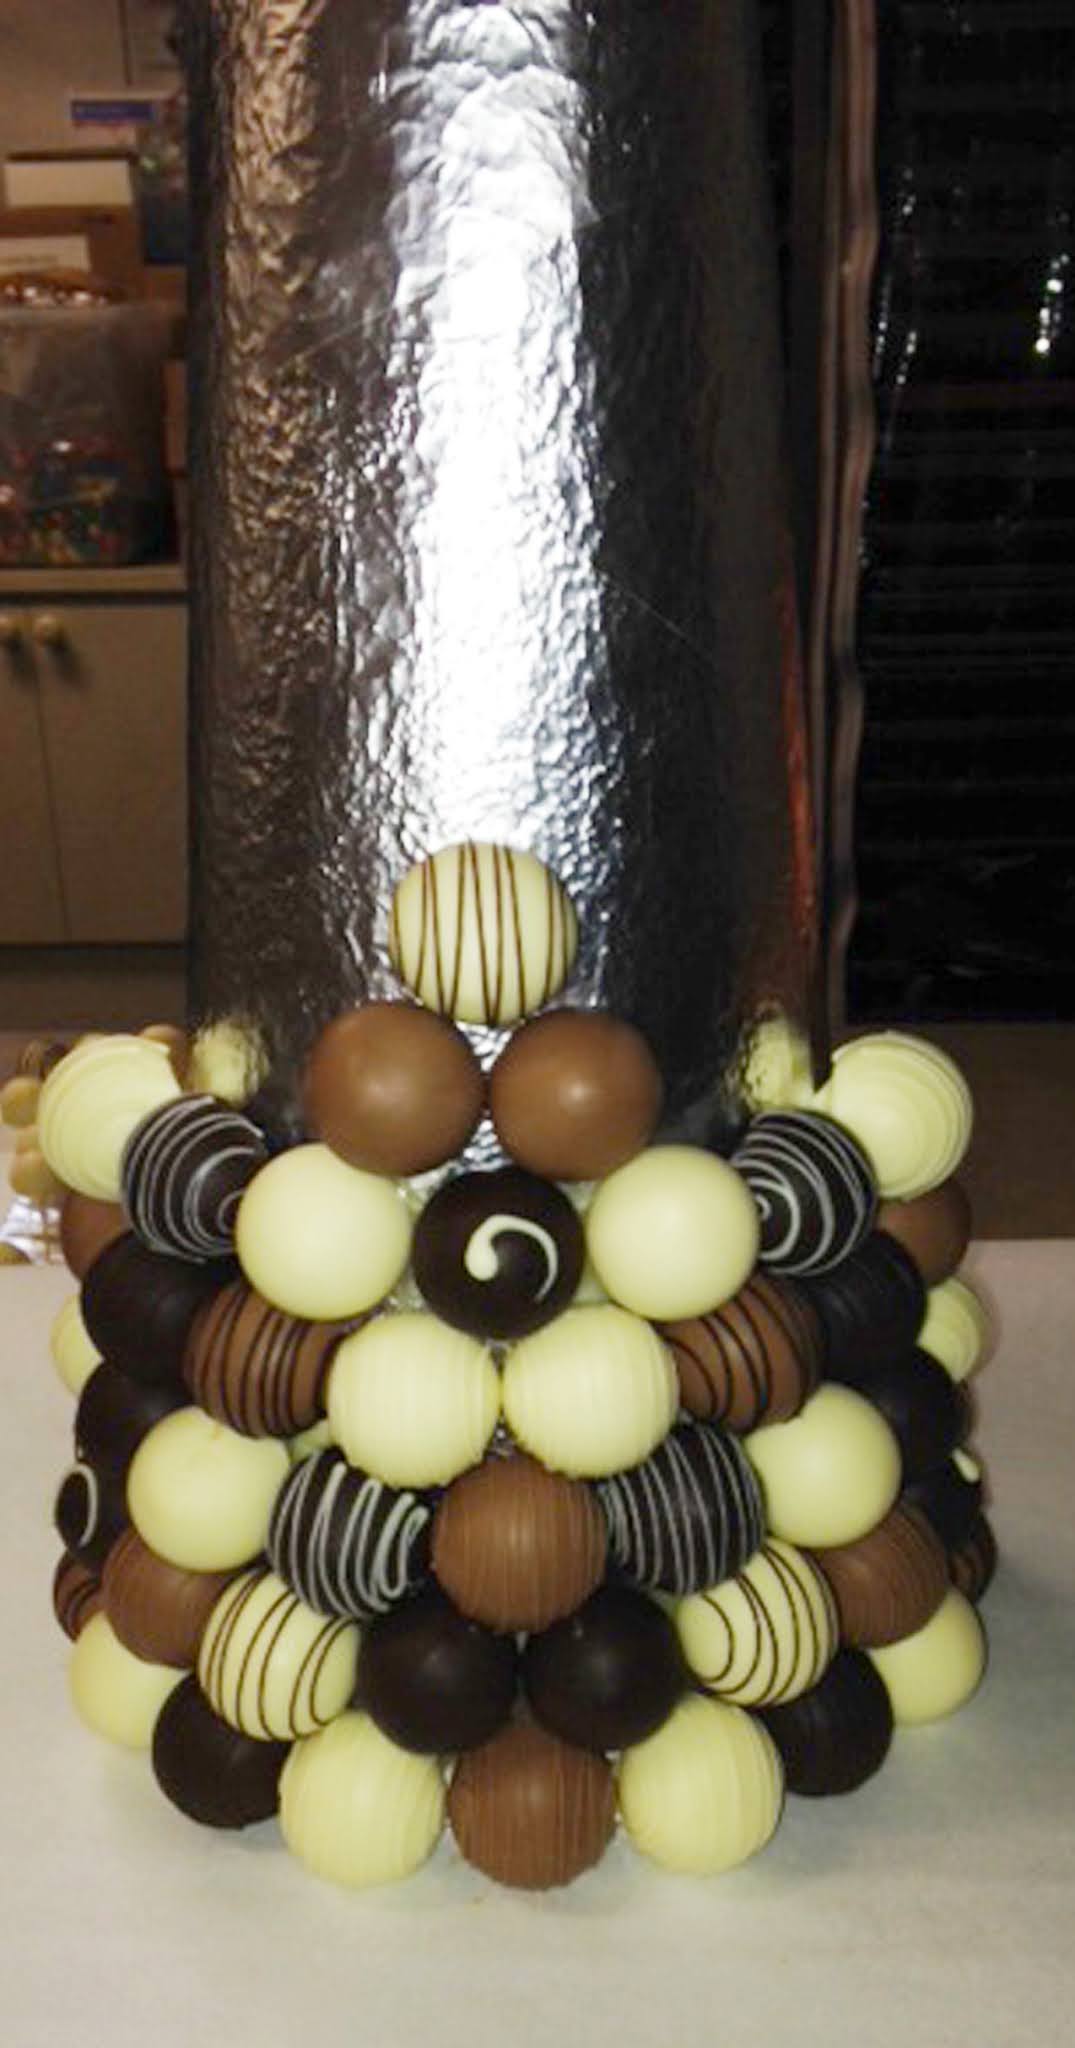
Beginning at the bottom of the cone, push the tooth-picked truffles into the cone working your way around the cone to create the first row. On the second row, stagger the truffles by placing them in the open spaces created by the first row. Carefully work your way up the cone row by row until the entire cone is covered in truffles. Toothpicks may need to be cut as you reach the top of the cone.

Crown the top of your tree by inserting a tooth-picked
truffle vertically on the top of the cone. Experiment with different tree
toppers, such as a large bow or a chocolate initial or number (birthday idea).
Use your imagination.
Once complete, stop and admire your beautiful work…then,
take a photo and post it on social media for a sneak peek of what you’ve been
working on. Here’s wishing you a spectacular holiday season ahead!
Crave more? If you
like what you read here, look for the "Subscribe now" box
on the right to enter your email address and start receiving weekly tips, like
this, delivered straight to your email inbox. RCI's Tip of the Week blog is
just one of the many resources we offer to help candy makers refine their
craft and build upon their business and marketing practices. Follow us on Facebook for
even more sweet inspiration.
Not a member? Click here to learn how RCI can help you build your sweet business.